
Installation
6 Steps · Follow in order
1
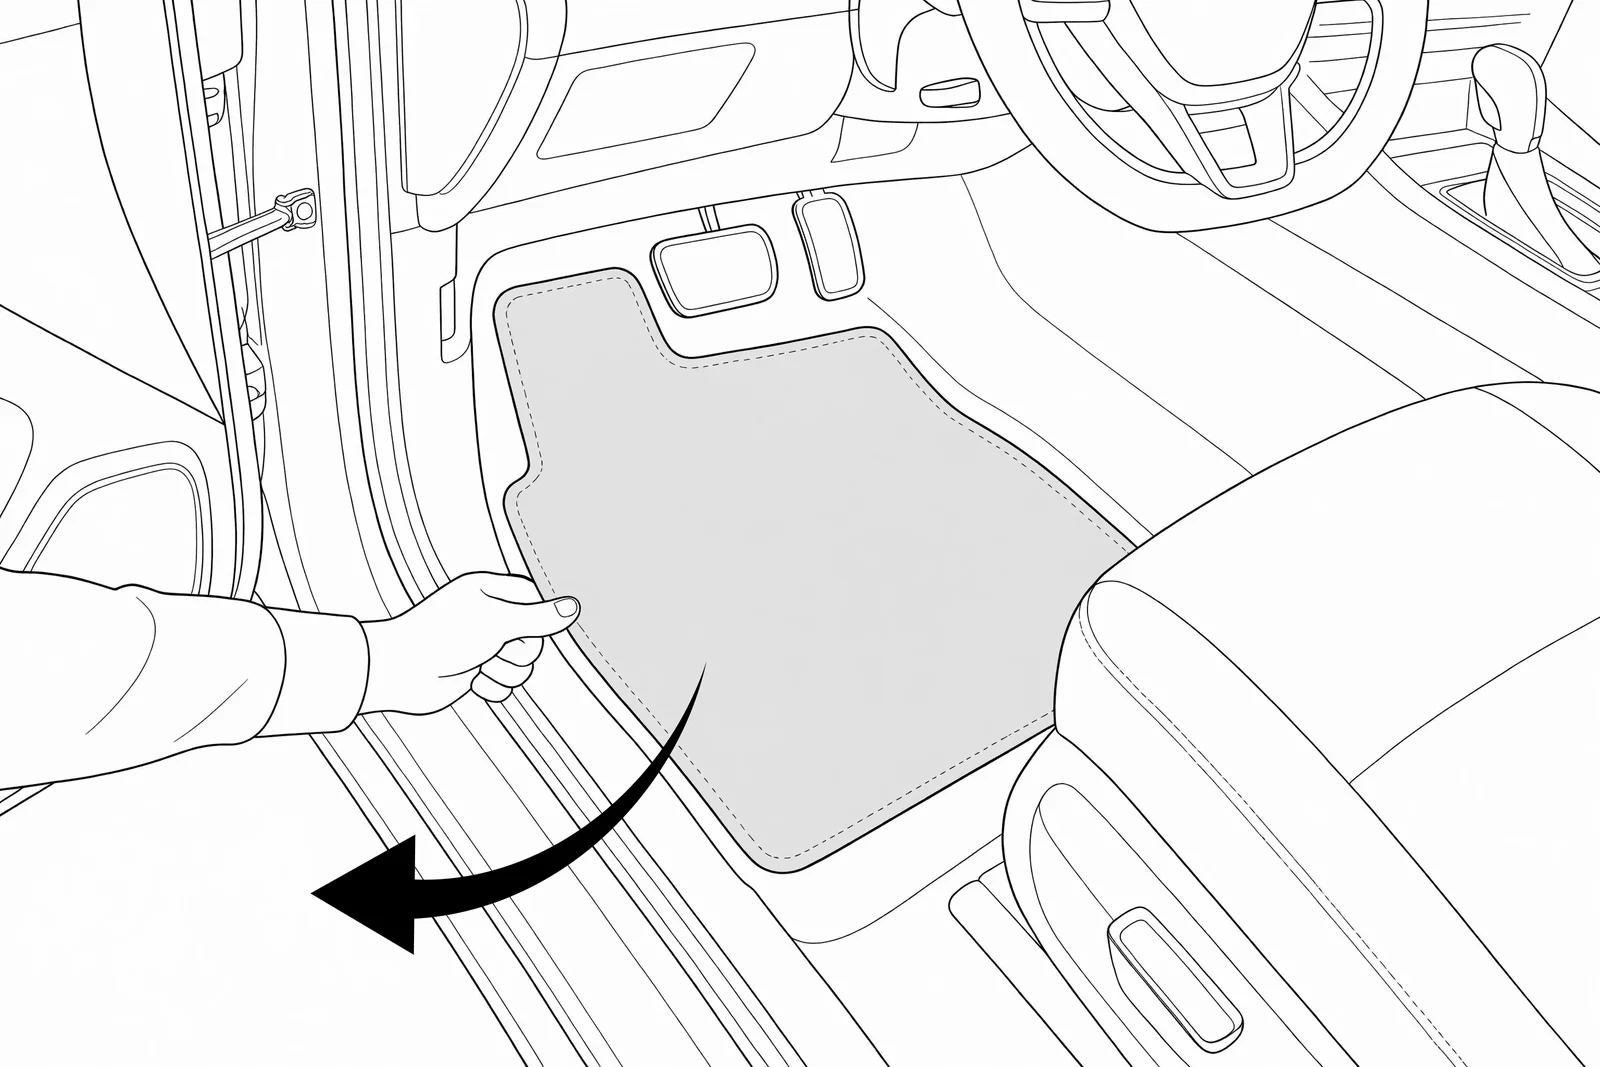
Remove existing mats BEST FIT
Remove existing mats first — the Prime EVA mat needs full contact with a bare floor for the best fit.
Step 1 illustration
Set old mats aside for a clear view of the floor and retention hooks.
2
Check what's in your set
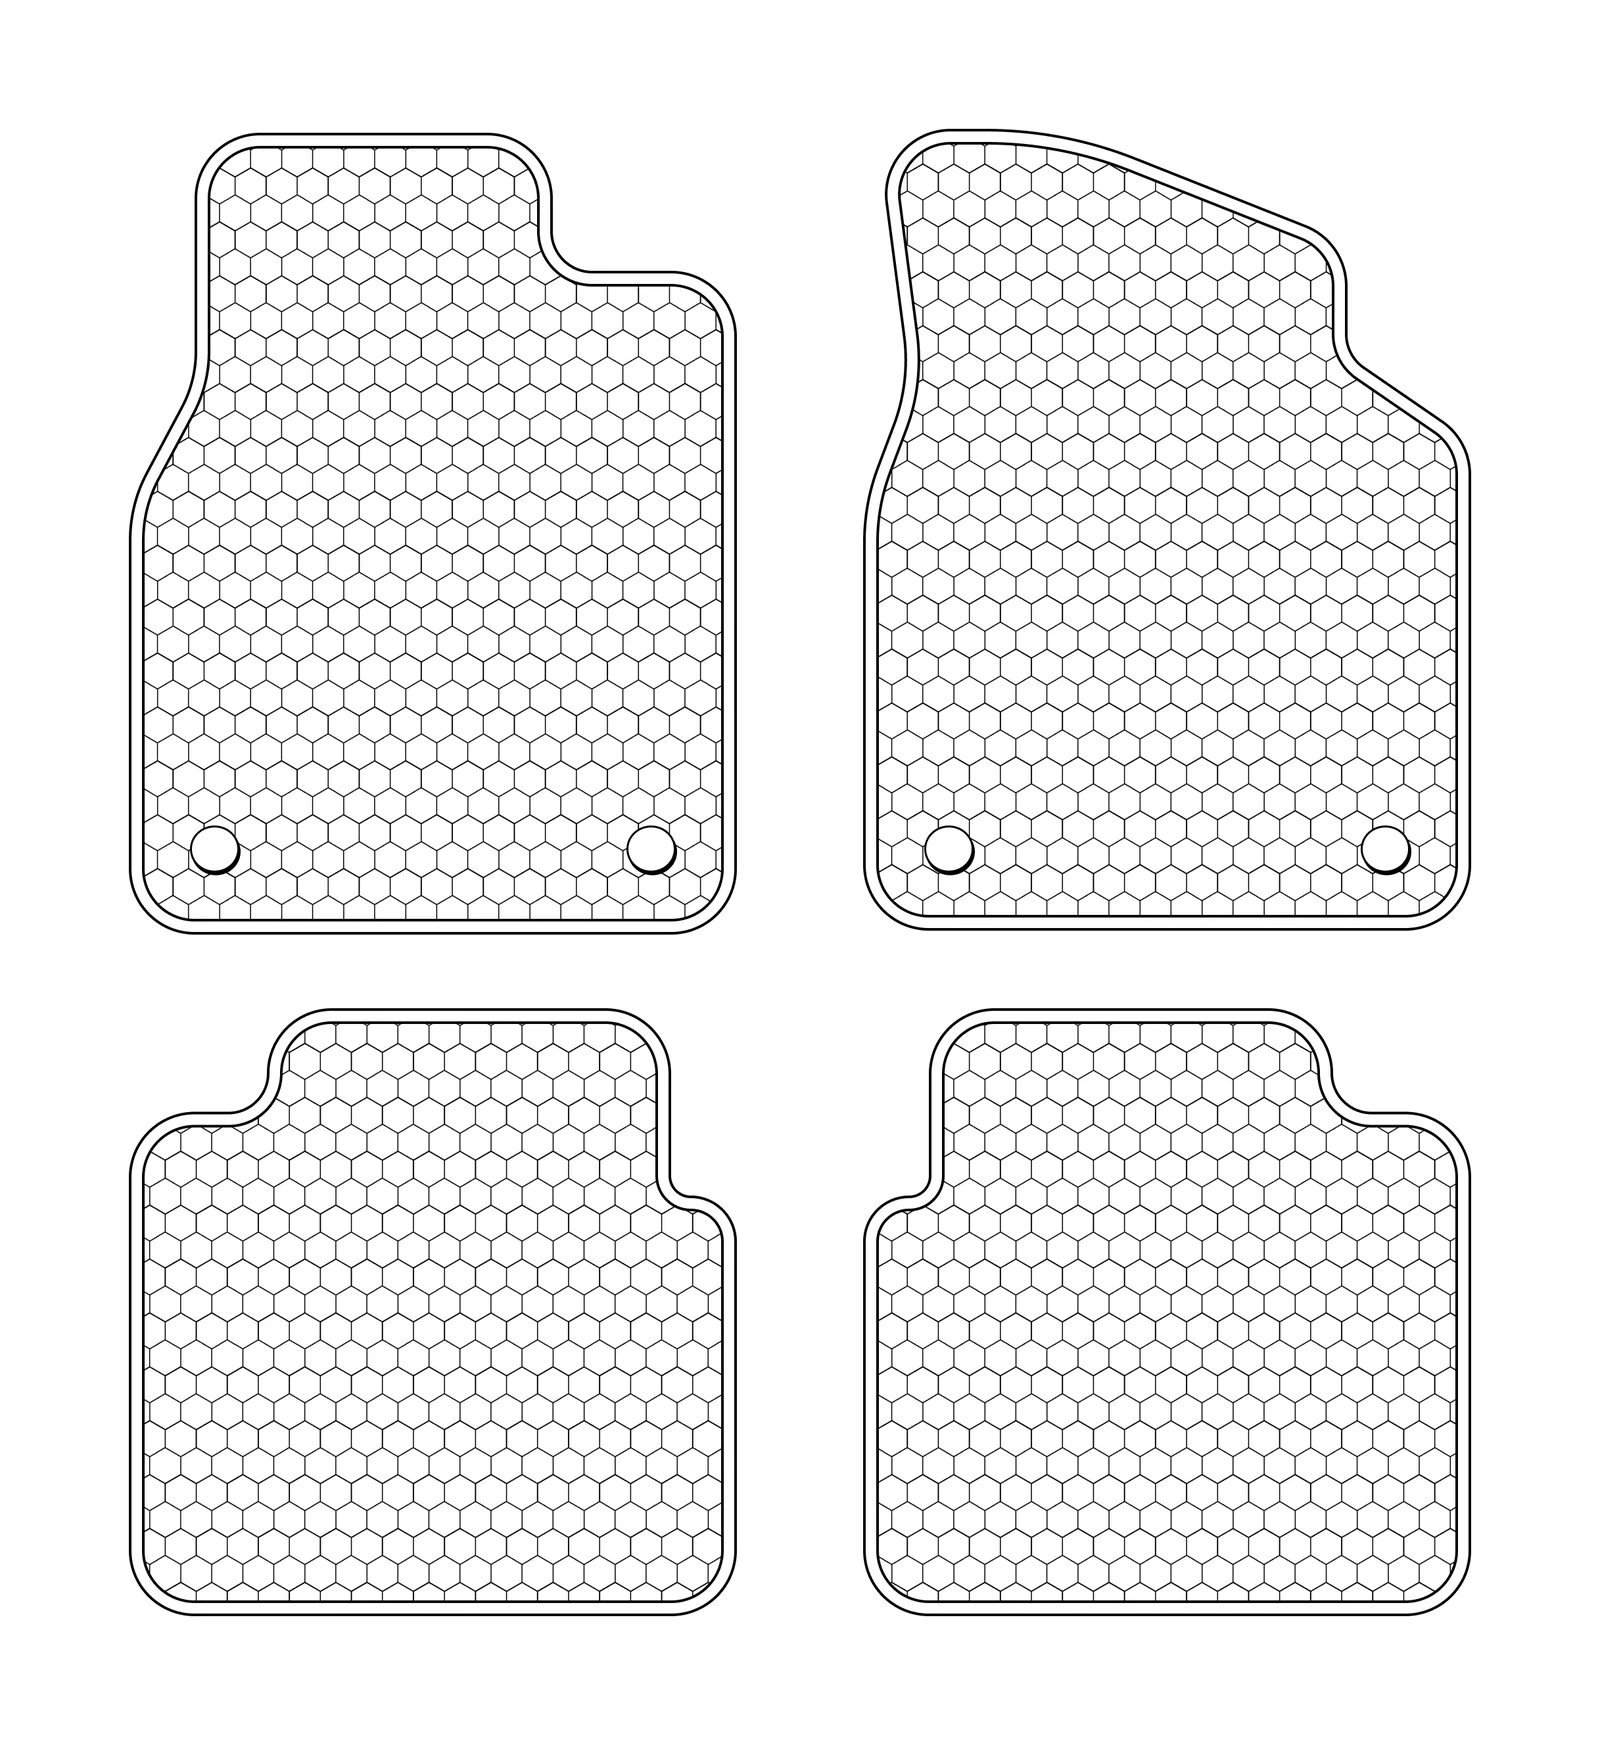
Lay all the mats out. Each covers one position — match them to your footwells using the example below. Shapes vary by car model, so go by size and outline.
Example layout
Typical layout — yours may differ by model. Front-left, front-right, and rear positions are distinct.
3
Identify mats
Each mat fits exactly one position — match them before installing.
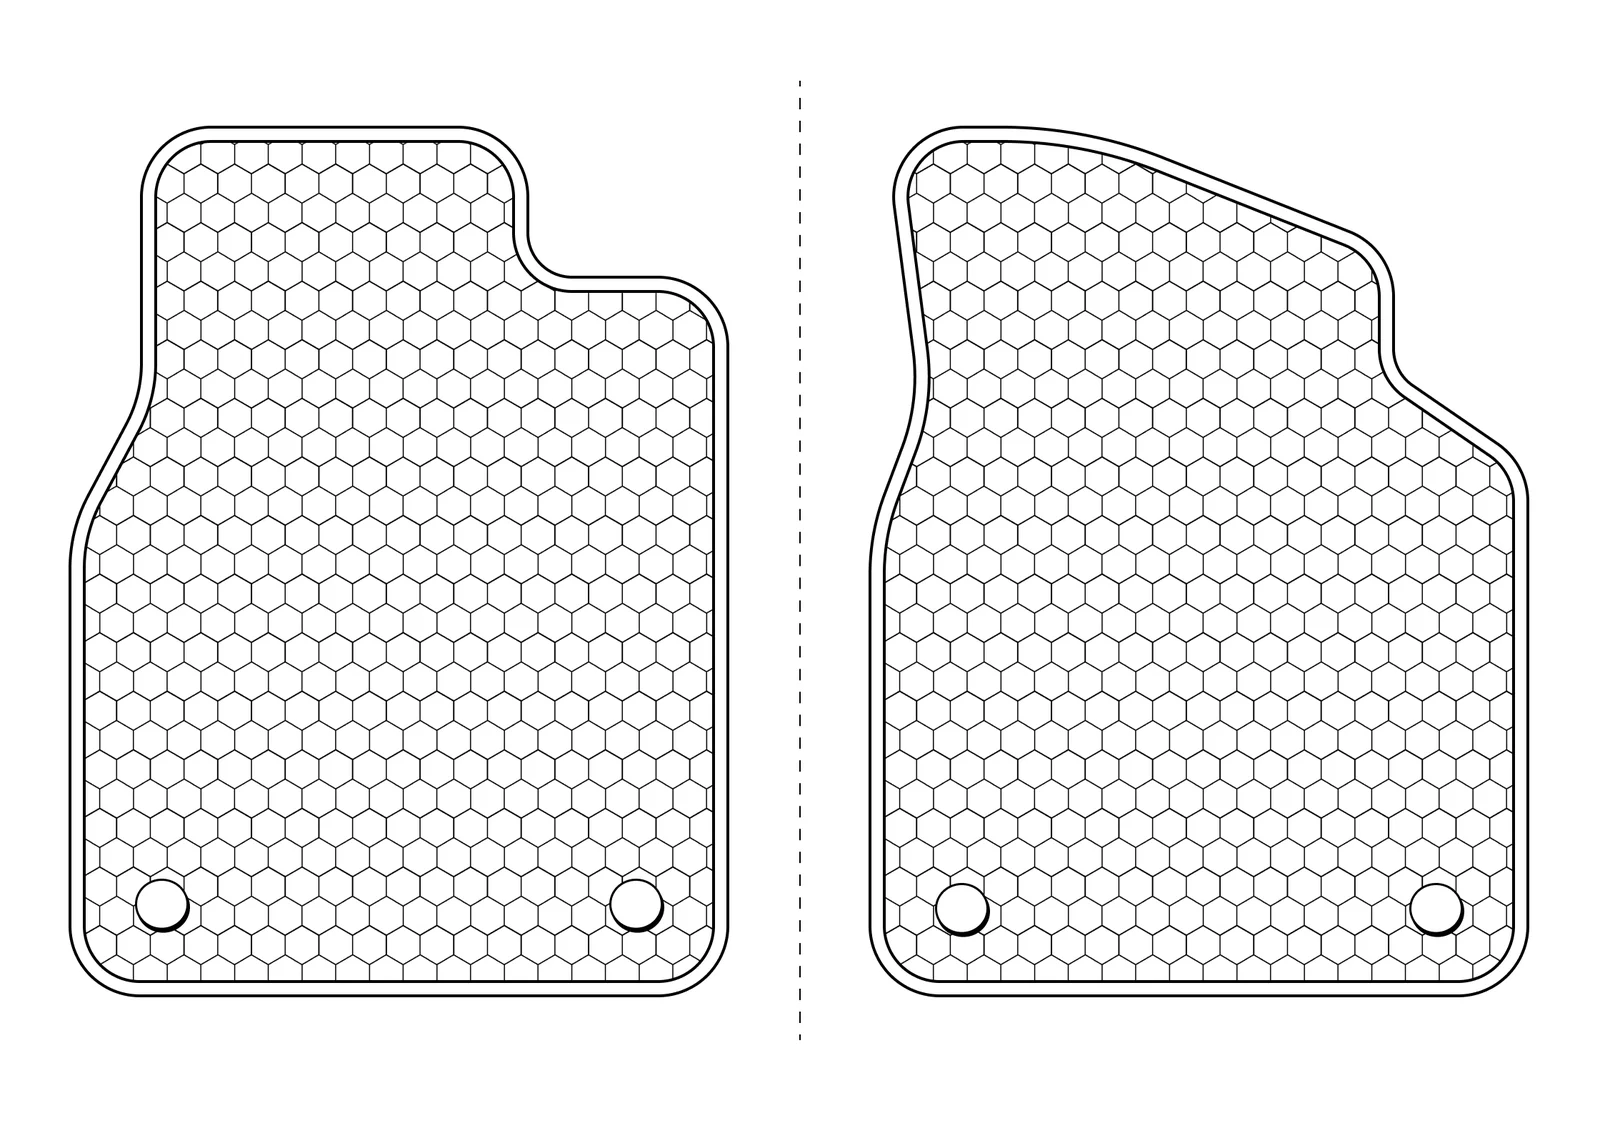
Front mats
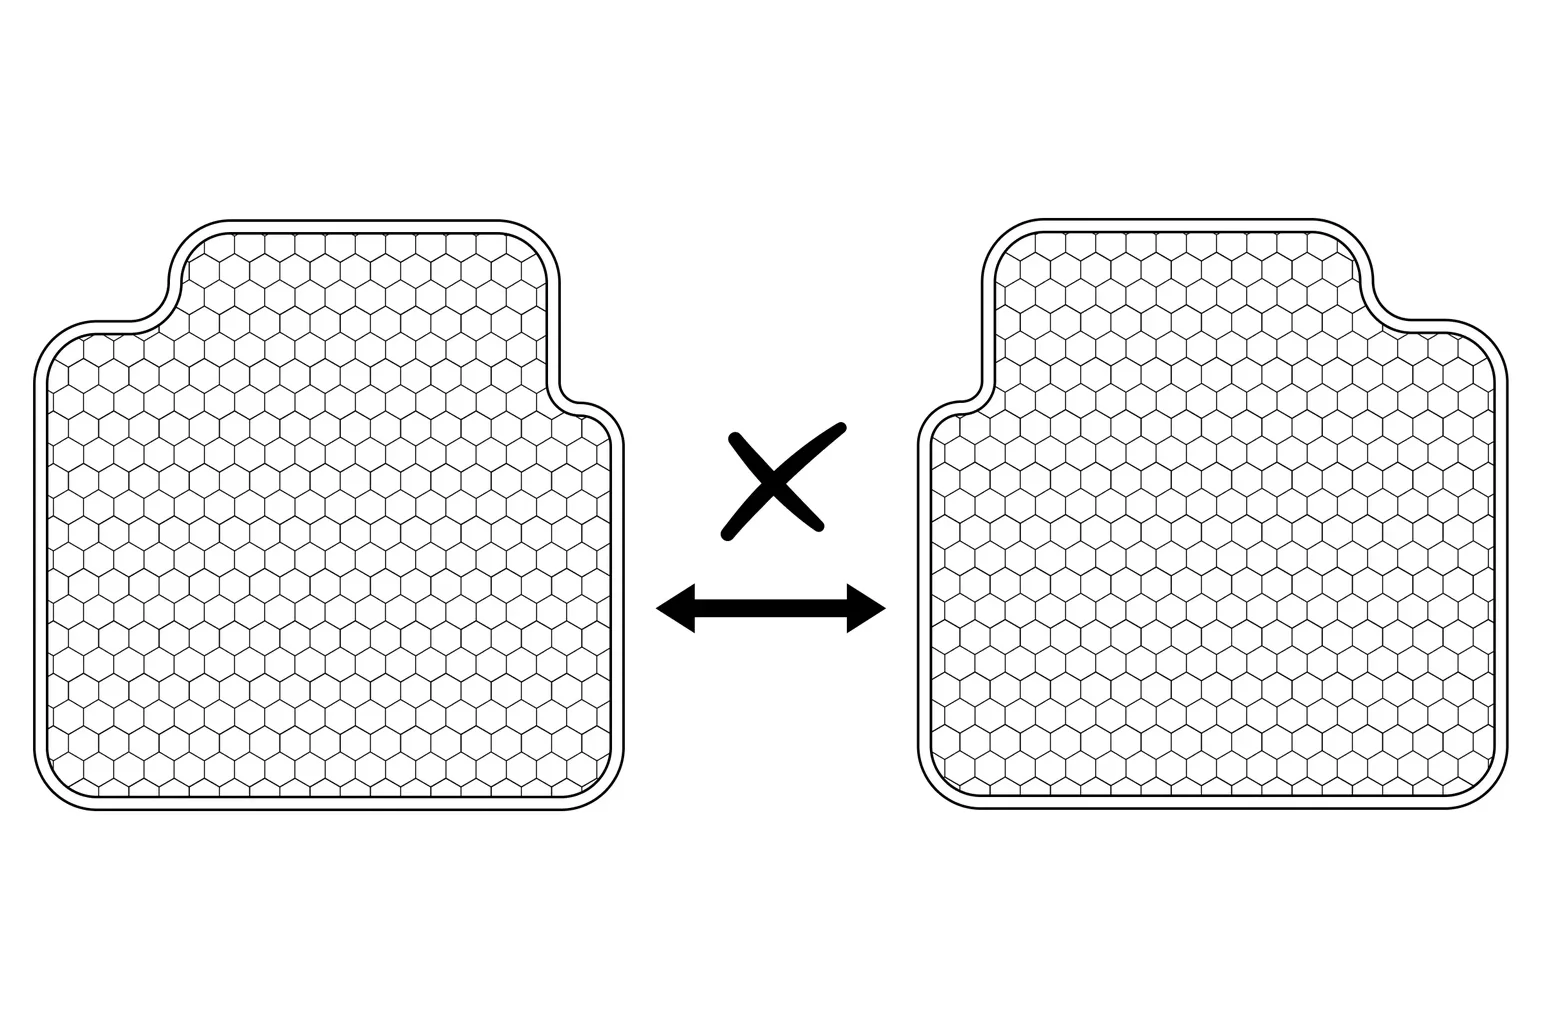
Driver and passenger mats are mirrored — check the retention hole and edge contour. Lay loosely: the correct side settles flat; if an edge lifts, swap.
Front mats — mirror pair
Left and right are not interchangeable.
Rear passenger mats
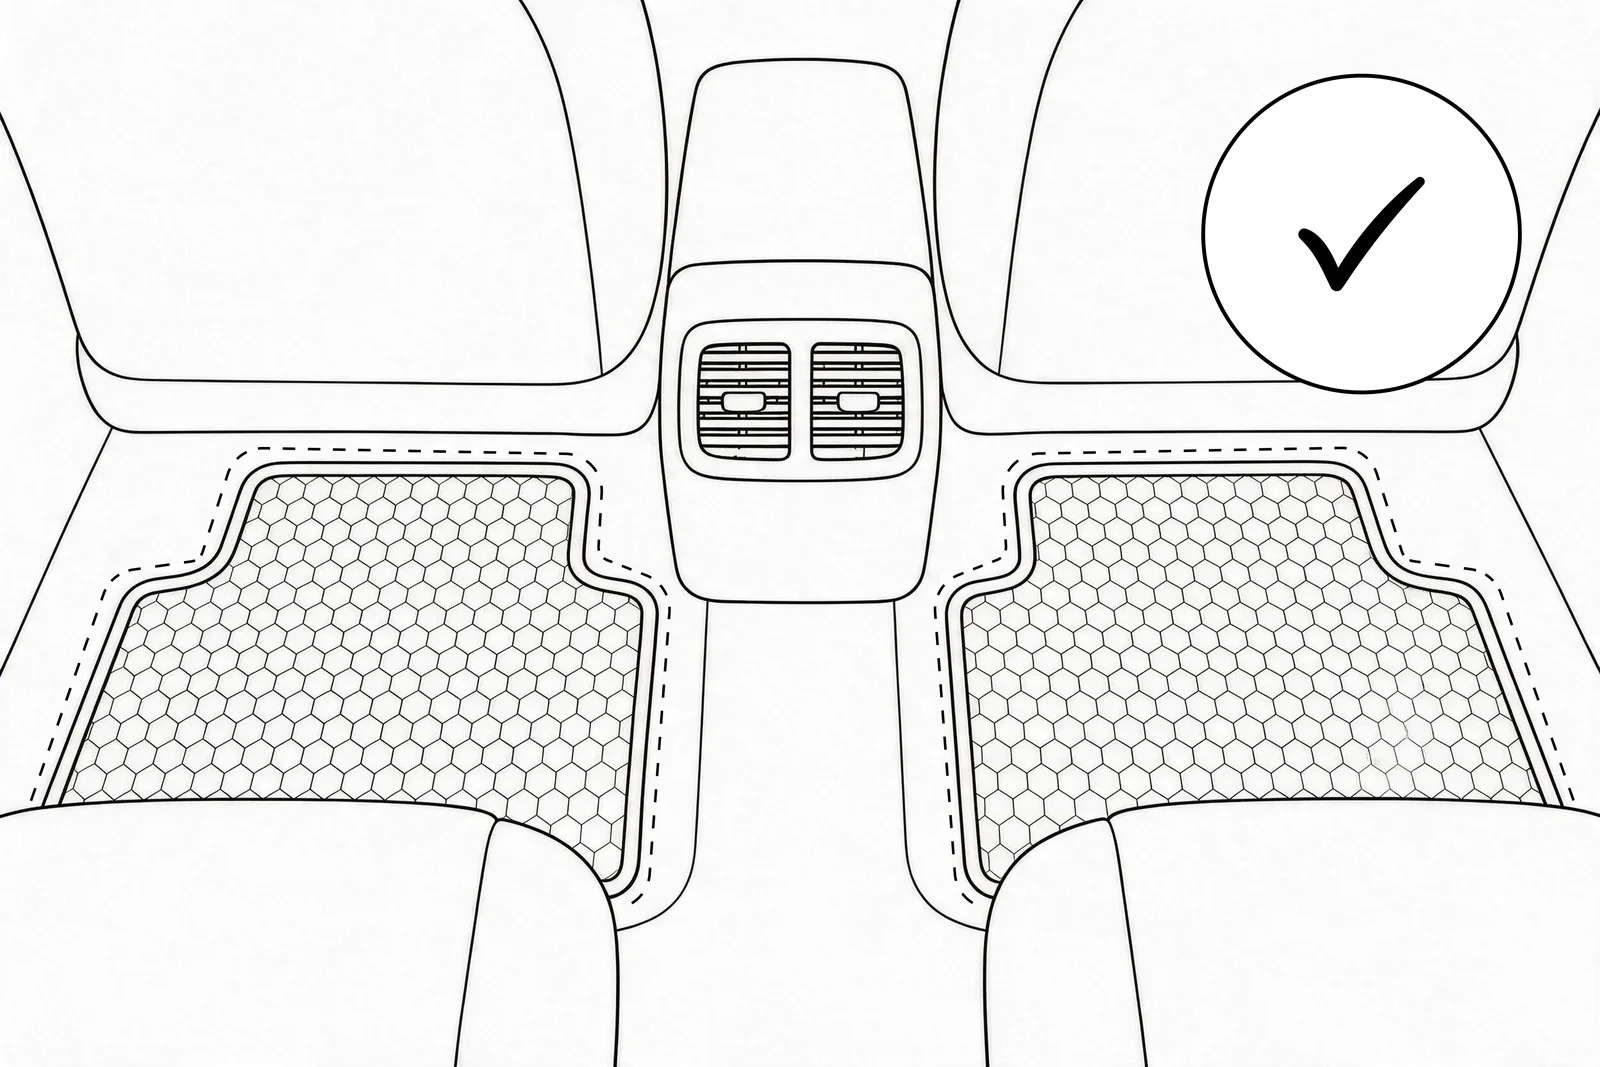
Most rear mats have no retention holes and simply rest in the footwell. Some car models, however, do include retention hooks in the rear — if yours does, align the mat's holes and secure them the same way as the front mats (see Step 4). Rear mats are wider and shorter than front mats, and typically symmetrical. Left and right are often interchangeable, but check the contour against each footwell if unsure.
Correct placement
Both mats sit flat against the footwell walls with no lifted edges.
Not always interchangeable
Left and right rear mats are not always identical — check contour before swapping.
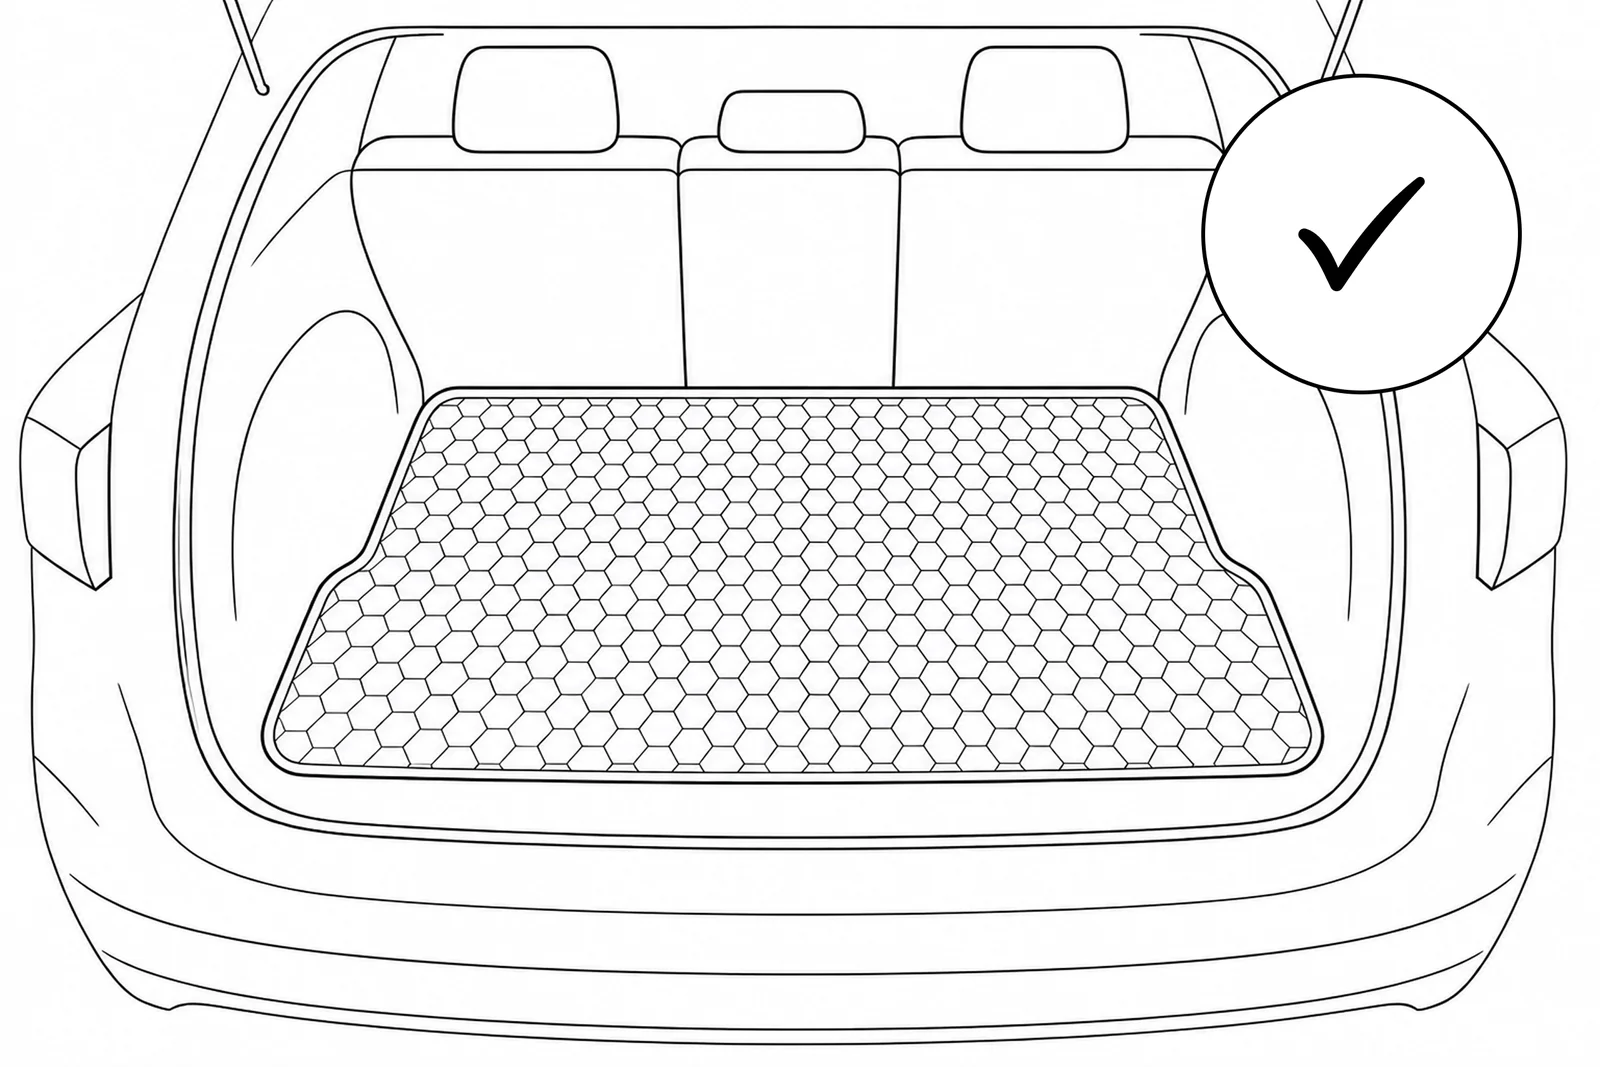
Trunk mat
The trunk mat is the largest piece in the set — only one orientation is correct: the notched or angled edge faces toward the rear seats. Do not fold or crease it when fitting.
Correct fit
Mat lies flat across the full load floor with no lifted edges.
Wrong orientation
Mat edges lift when placed in the wrong direction — flip 180°.
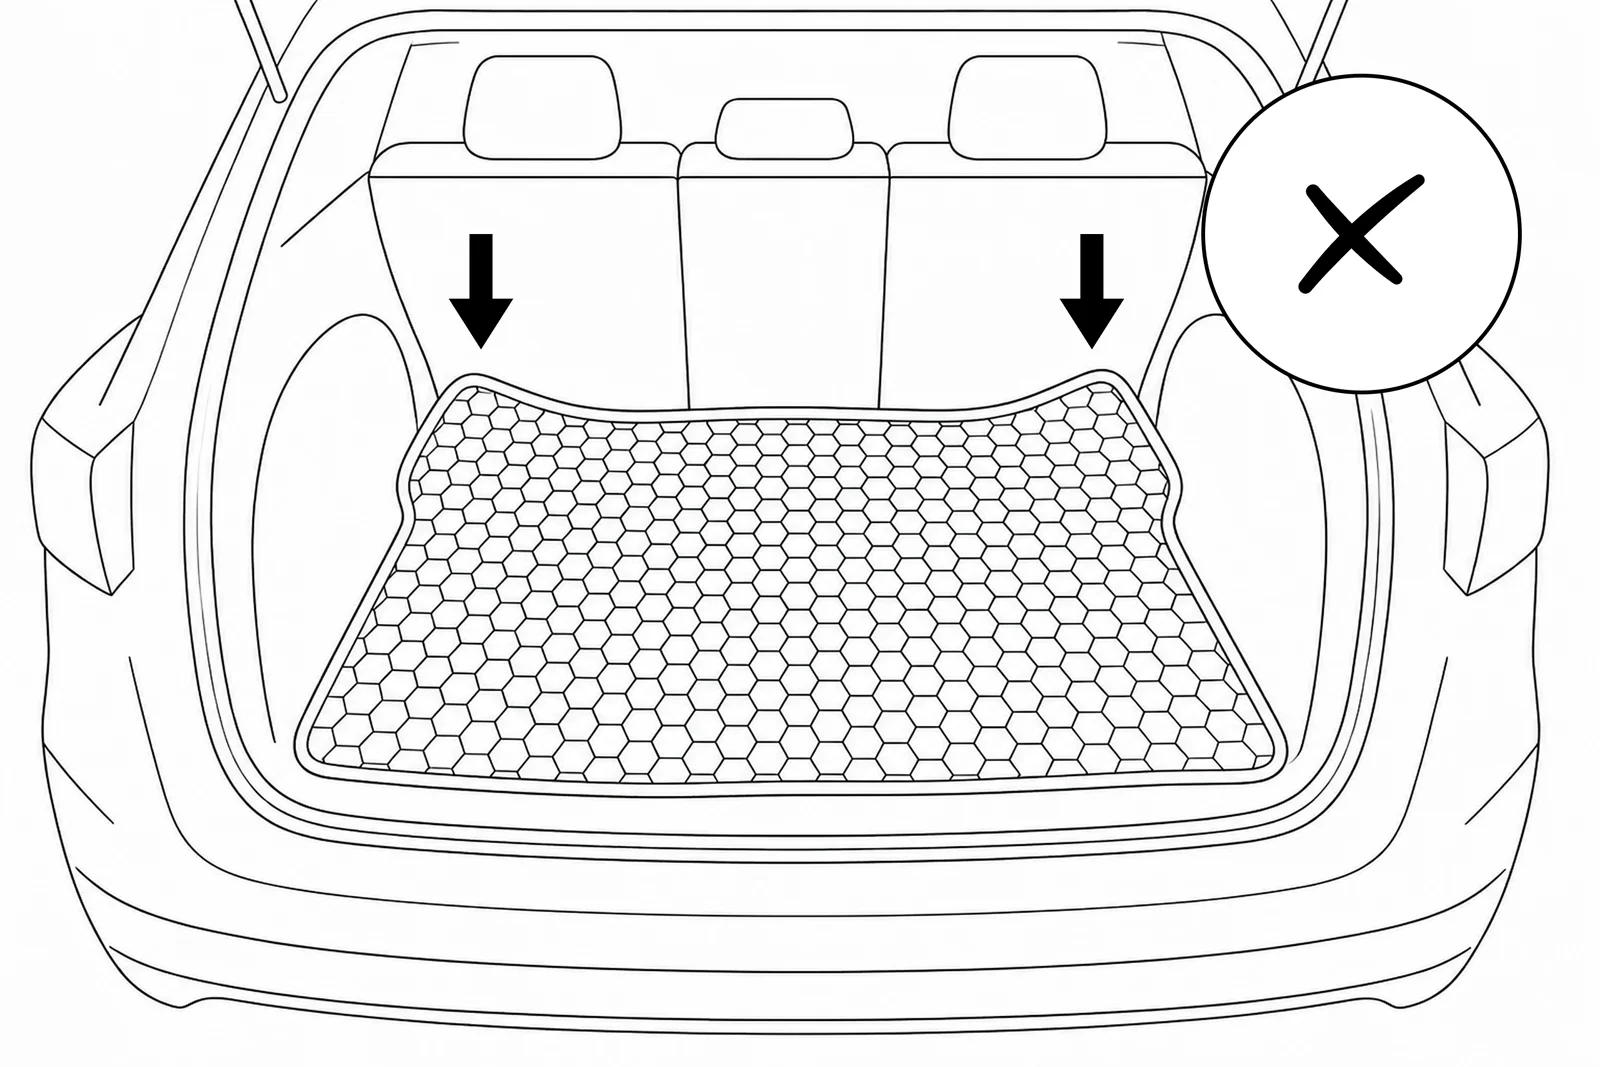
The trunk mat needs no retention clips. If it slides or won't lie flat, flip it 180°.
4
Secure using the retention system
First position the mat — align its holes with the retention hooks and lower it flat. Then lock the hooks — find your retention type below.
Positioning
Holes over the hooks, mat lowered flat — then secure.
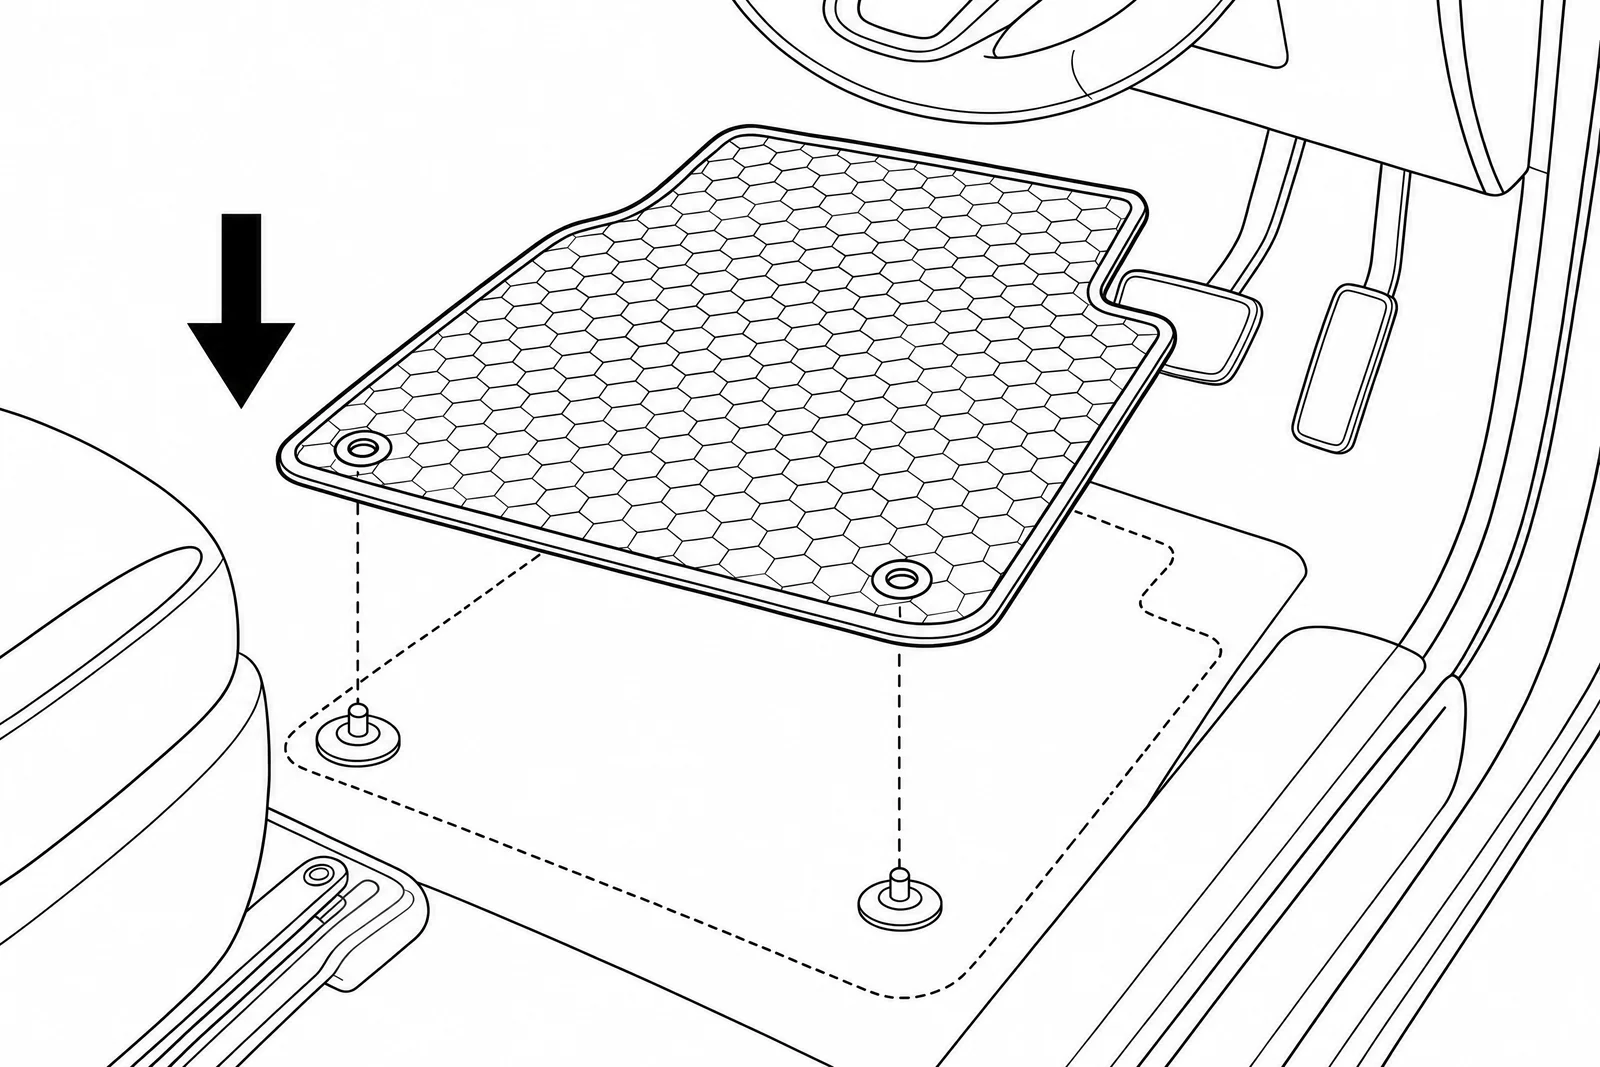
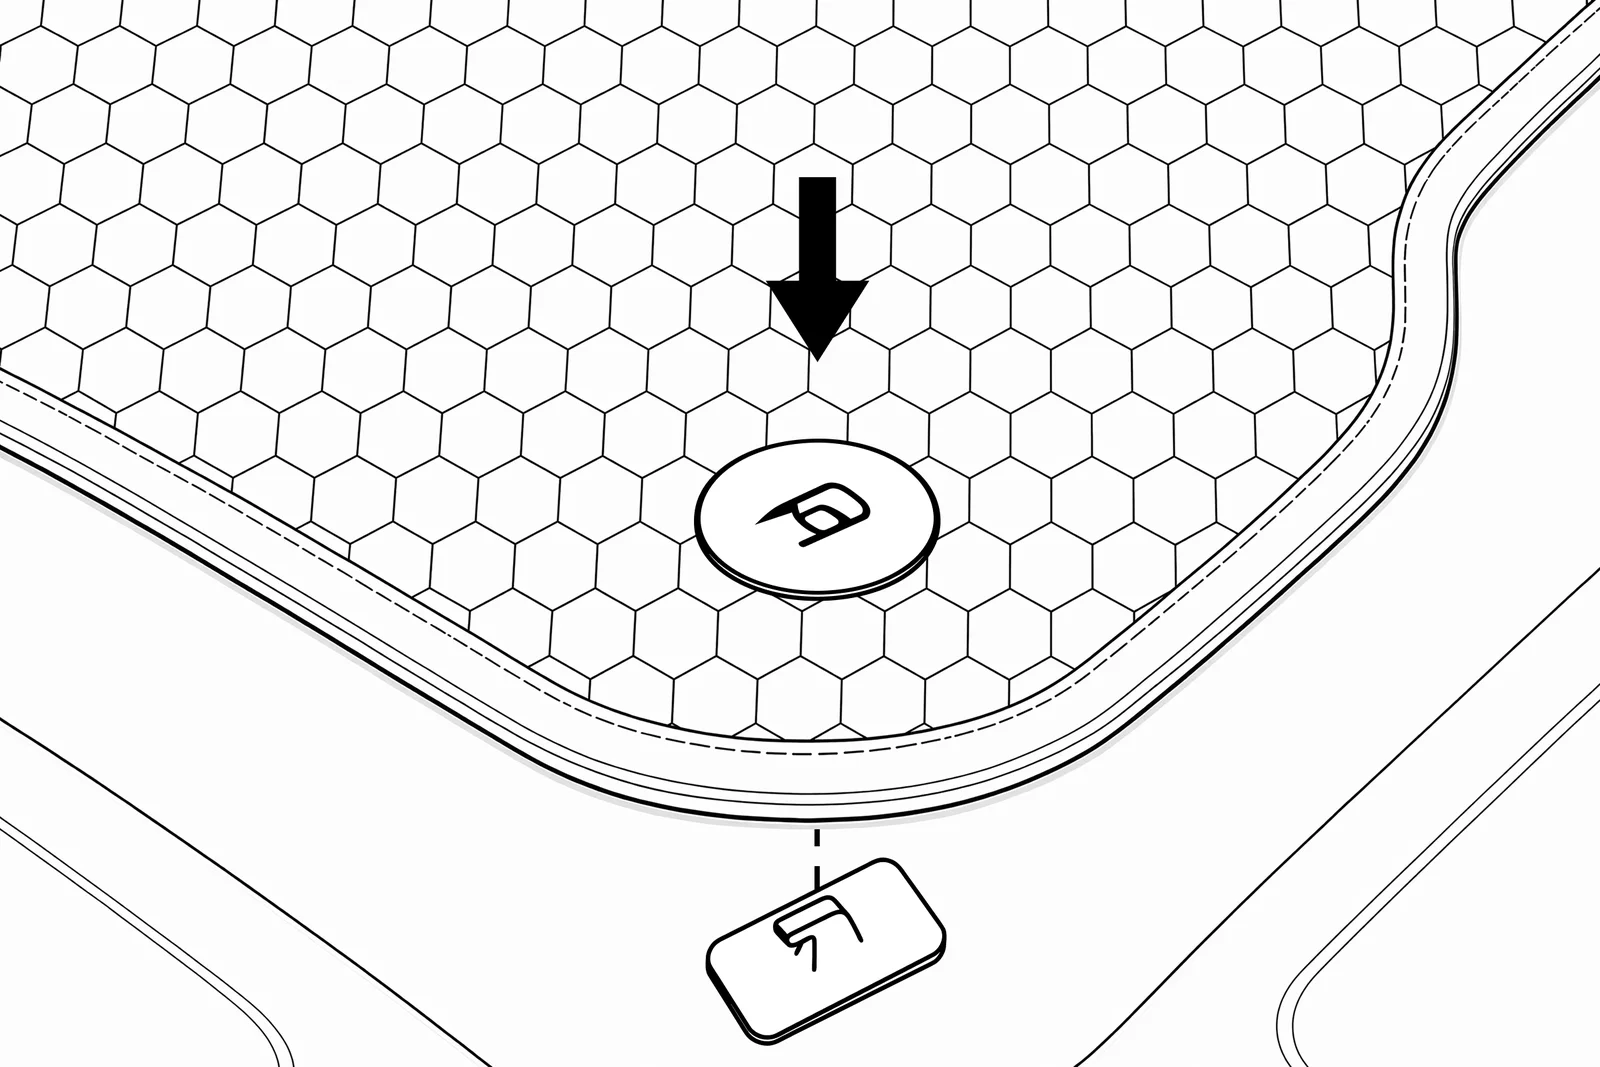
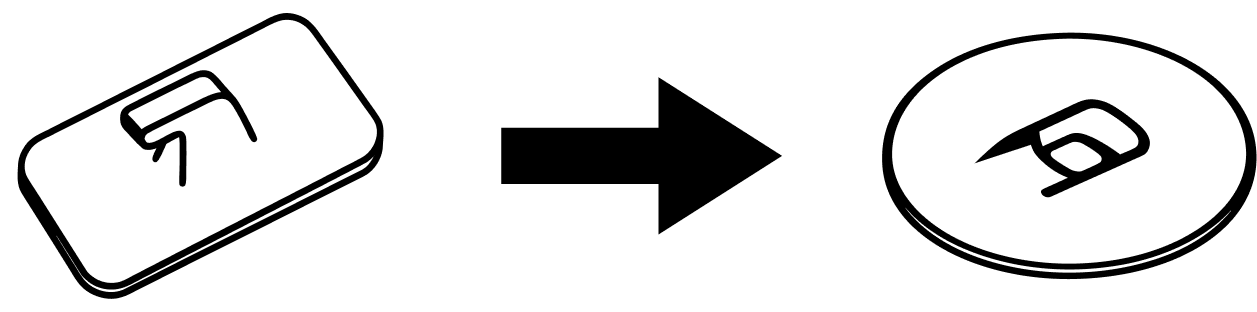
Type A
Insert the clip through the mat hole, then press down firmly to lock. The clip should click into place.
Type B
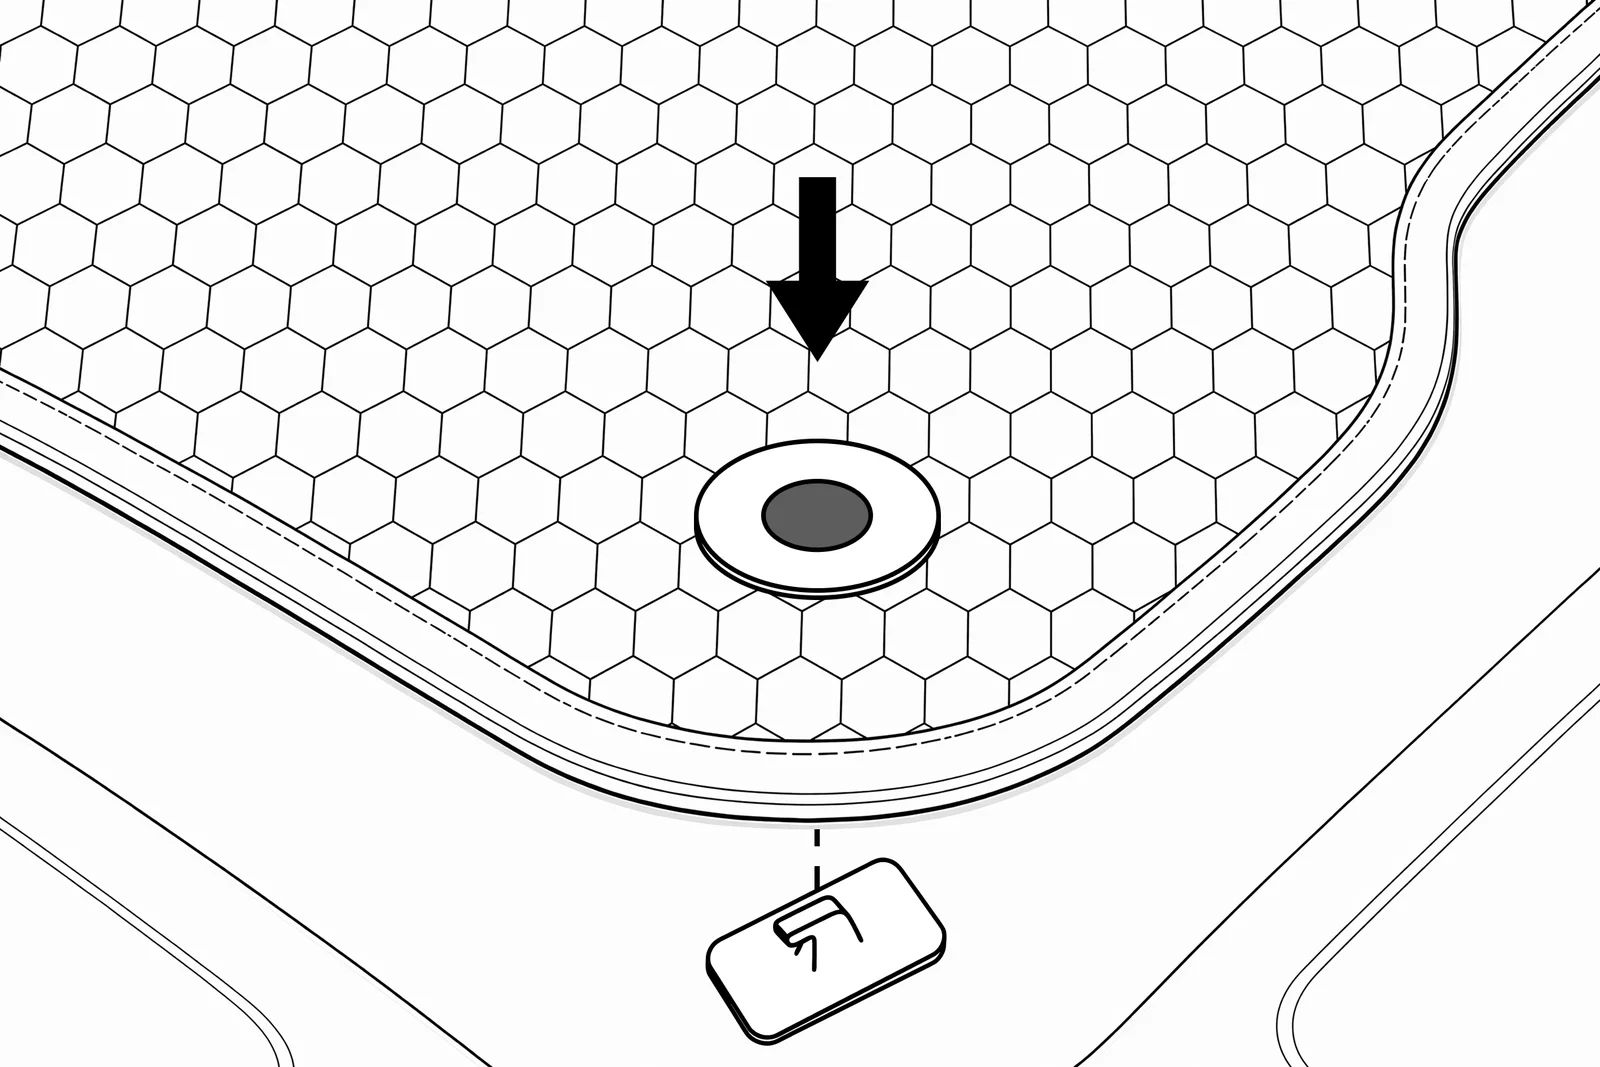
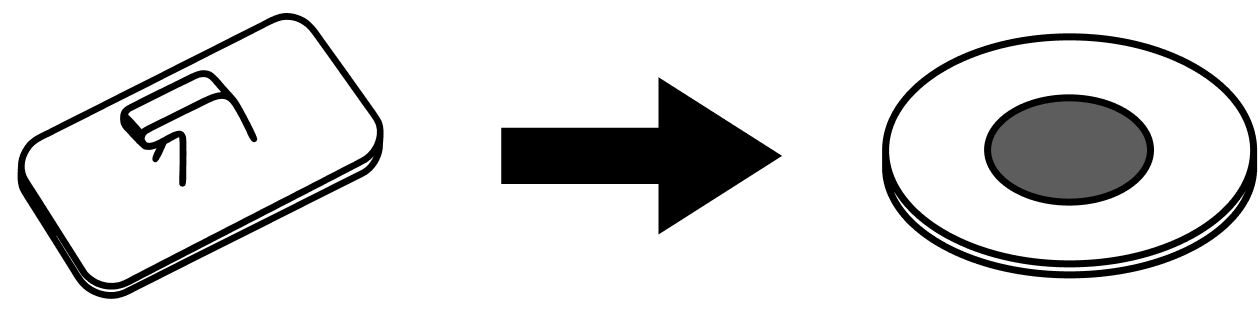
Place the mat over the fixed hook, aligning the hole, then attach the ring clip to secure.
Type C
Insert the hook through the mat from below, then snap the outer clip into place on top.
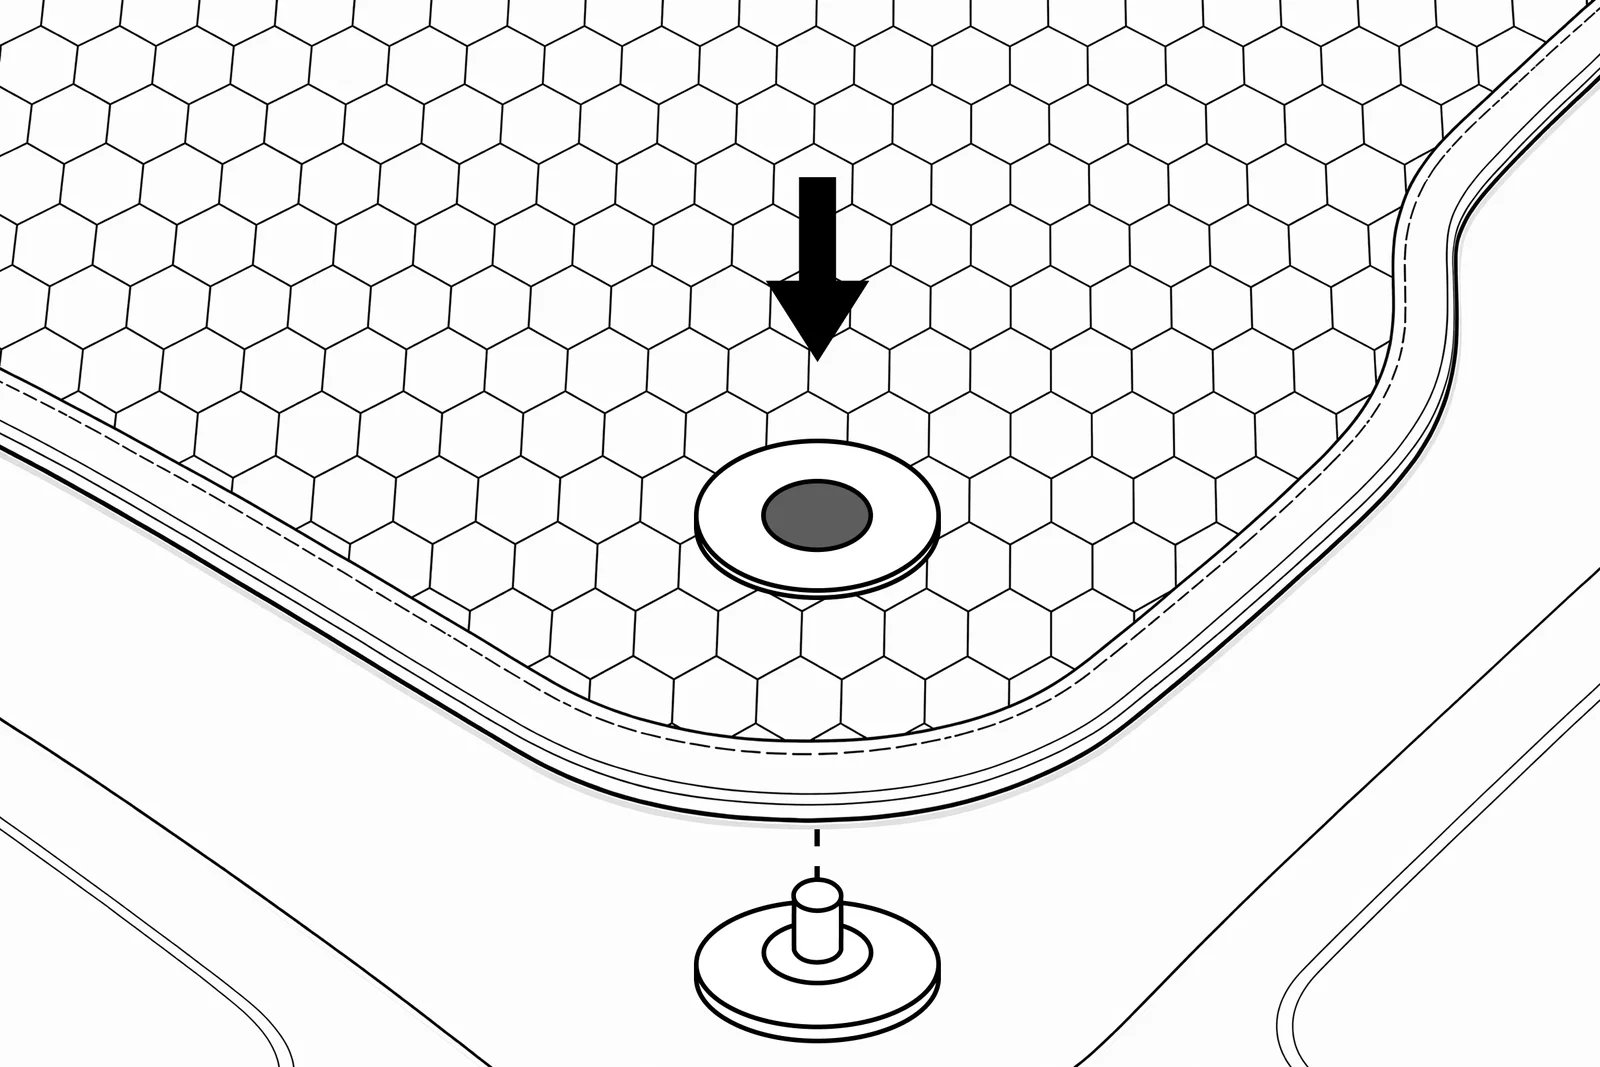

Type D
Insert the hook through the mat hole, then rotate 90° clockwise to lock it in position.
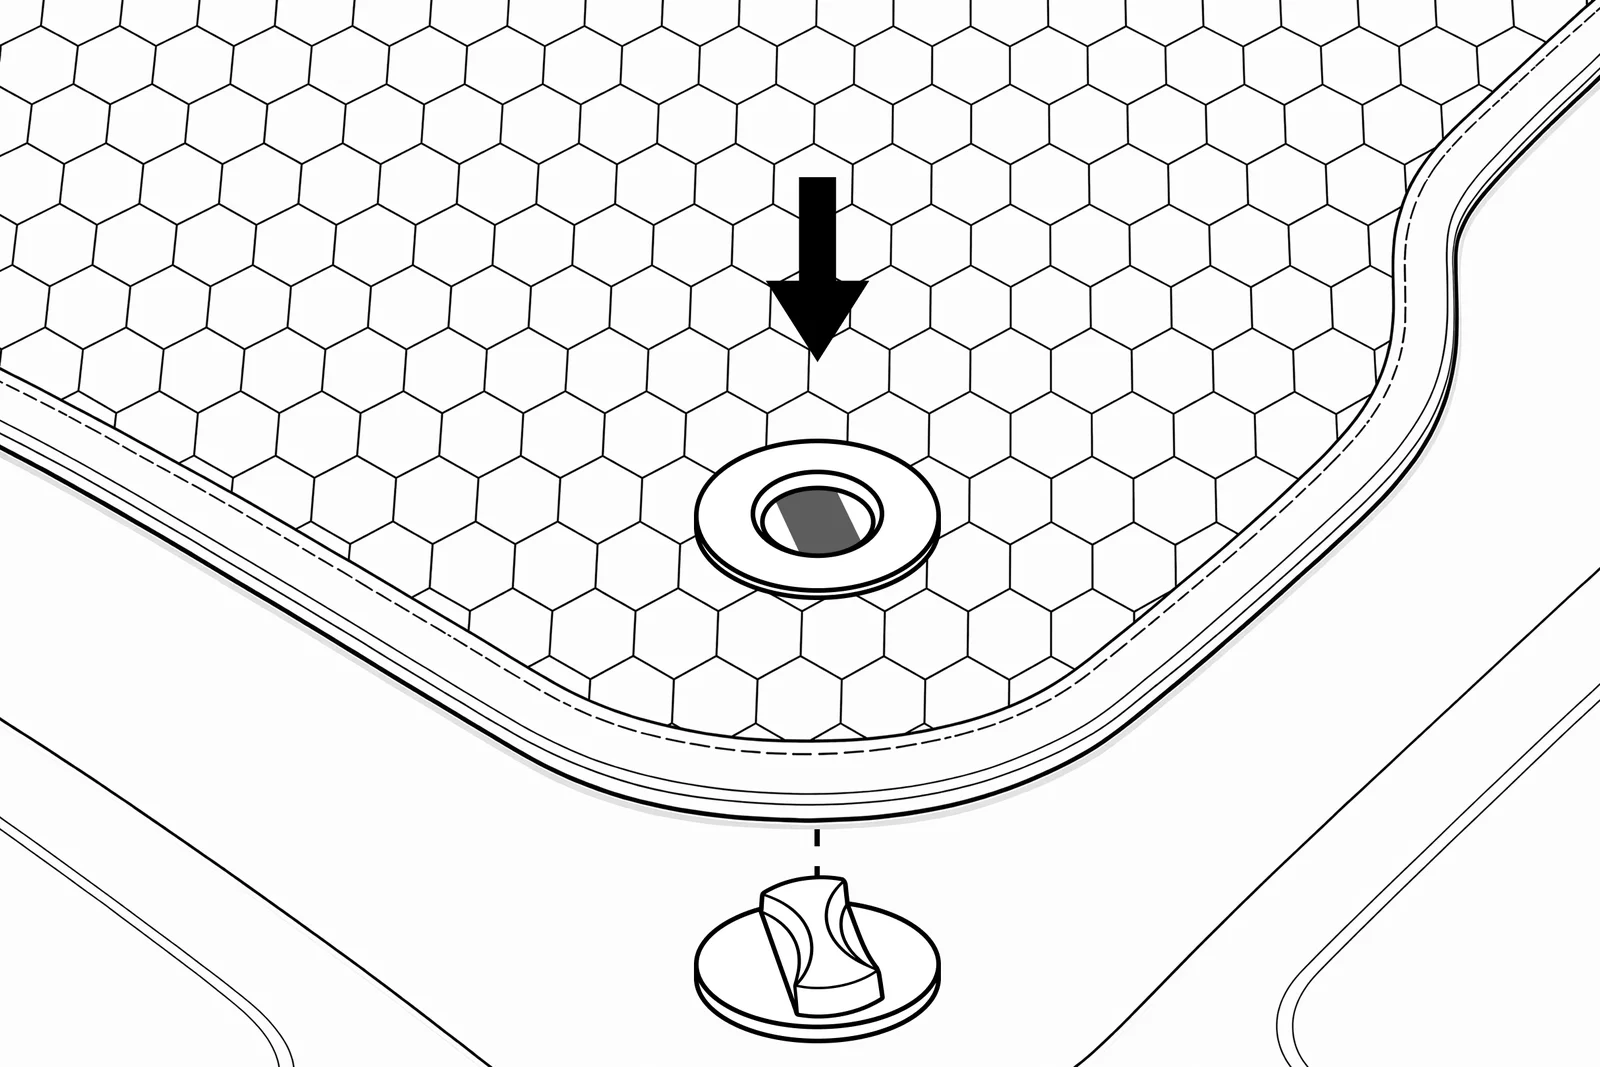

If the driver's mat can't be secured, don't install it — contact support and we will help find a solution.
Hook-and-loop (Velcro) pads. Certain mats include hook-and-loop pads that help hold the mat in place, either on their own or alongside the retention hooks. The factory-fitted pads grip standard carpet pile and hold the mat firmly. On low-pile carpet or hard/plastic floors they may not adhere — in that case we recommend adding stronger self-adhesive 3M hook-and-loop pads for a secure hold.
5
Check — flat, locked, and pedals free
Two checks per mat before moving on.
Check 1 — position
Mat fully flat, hook locked — no lifted corners or folded edges.
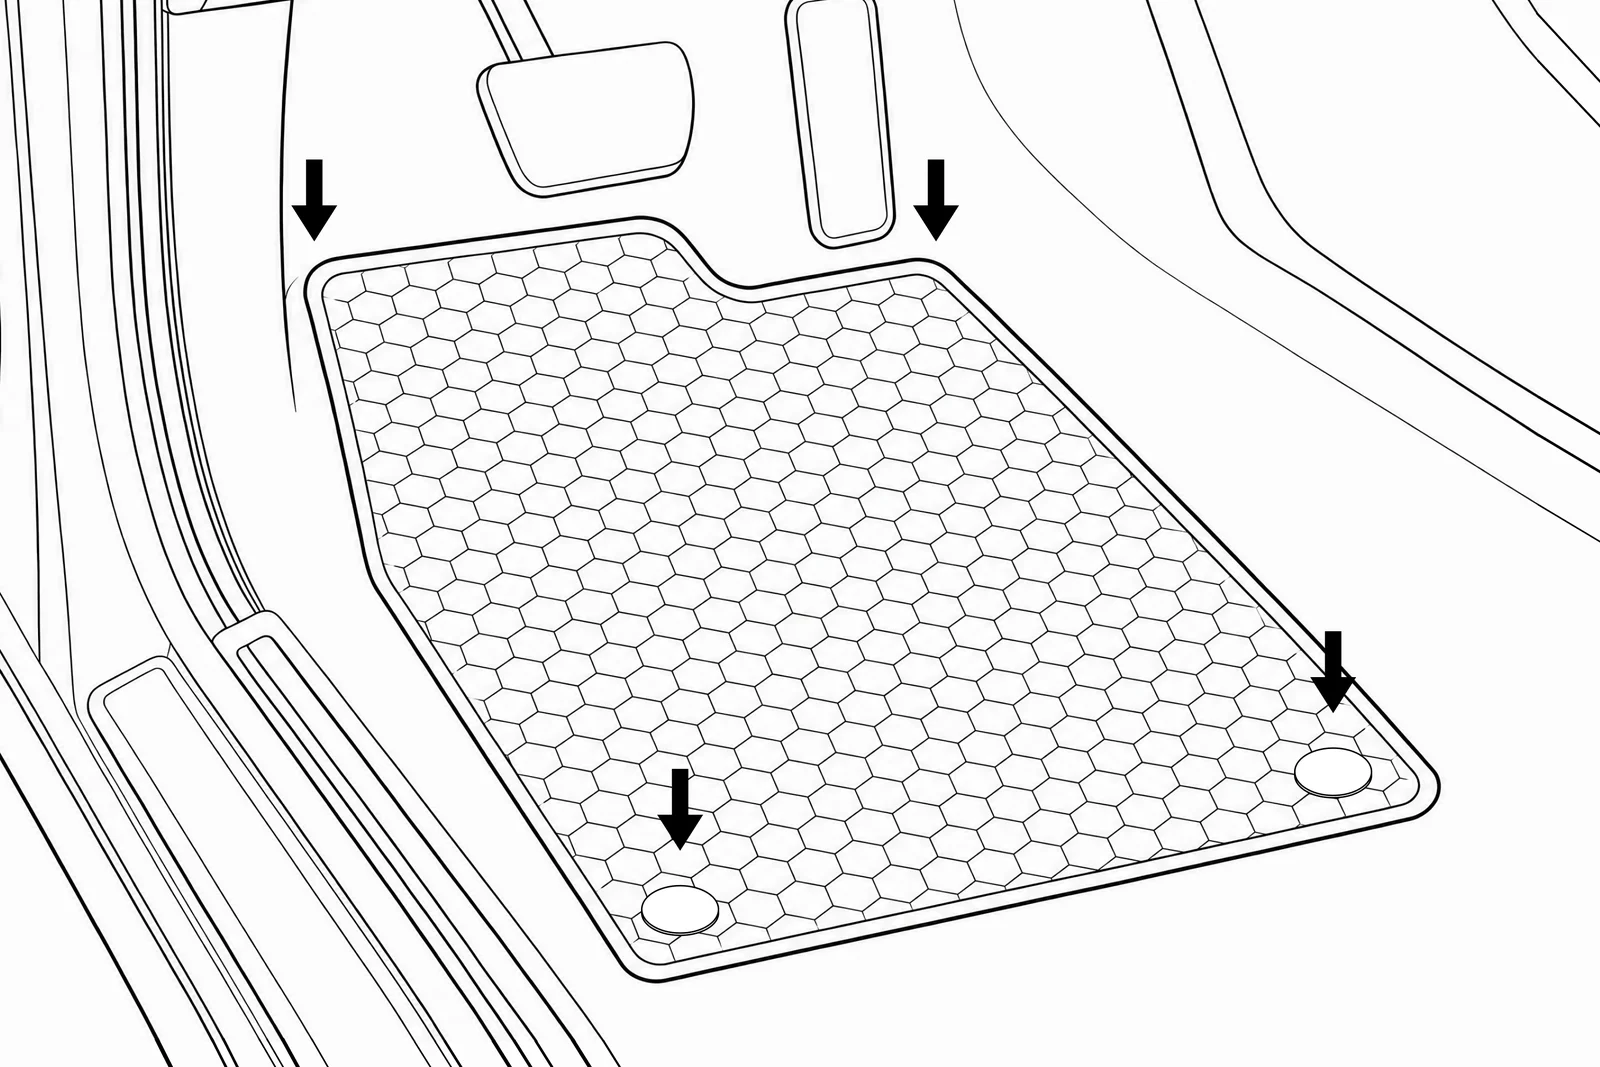
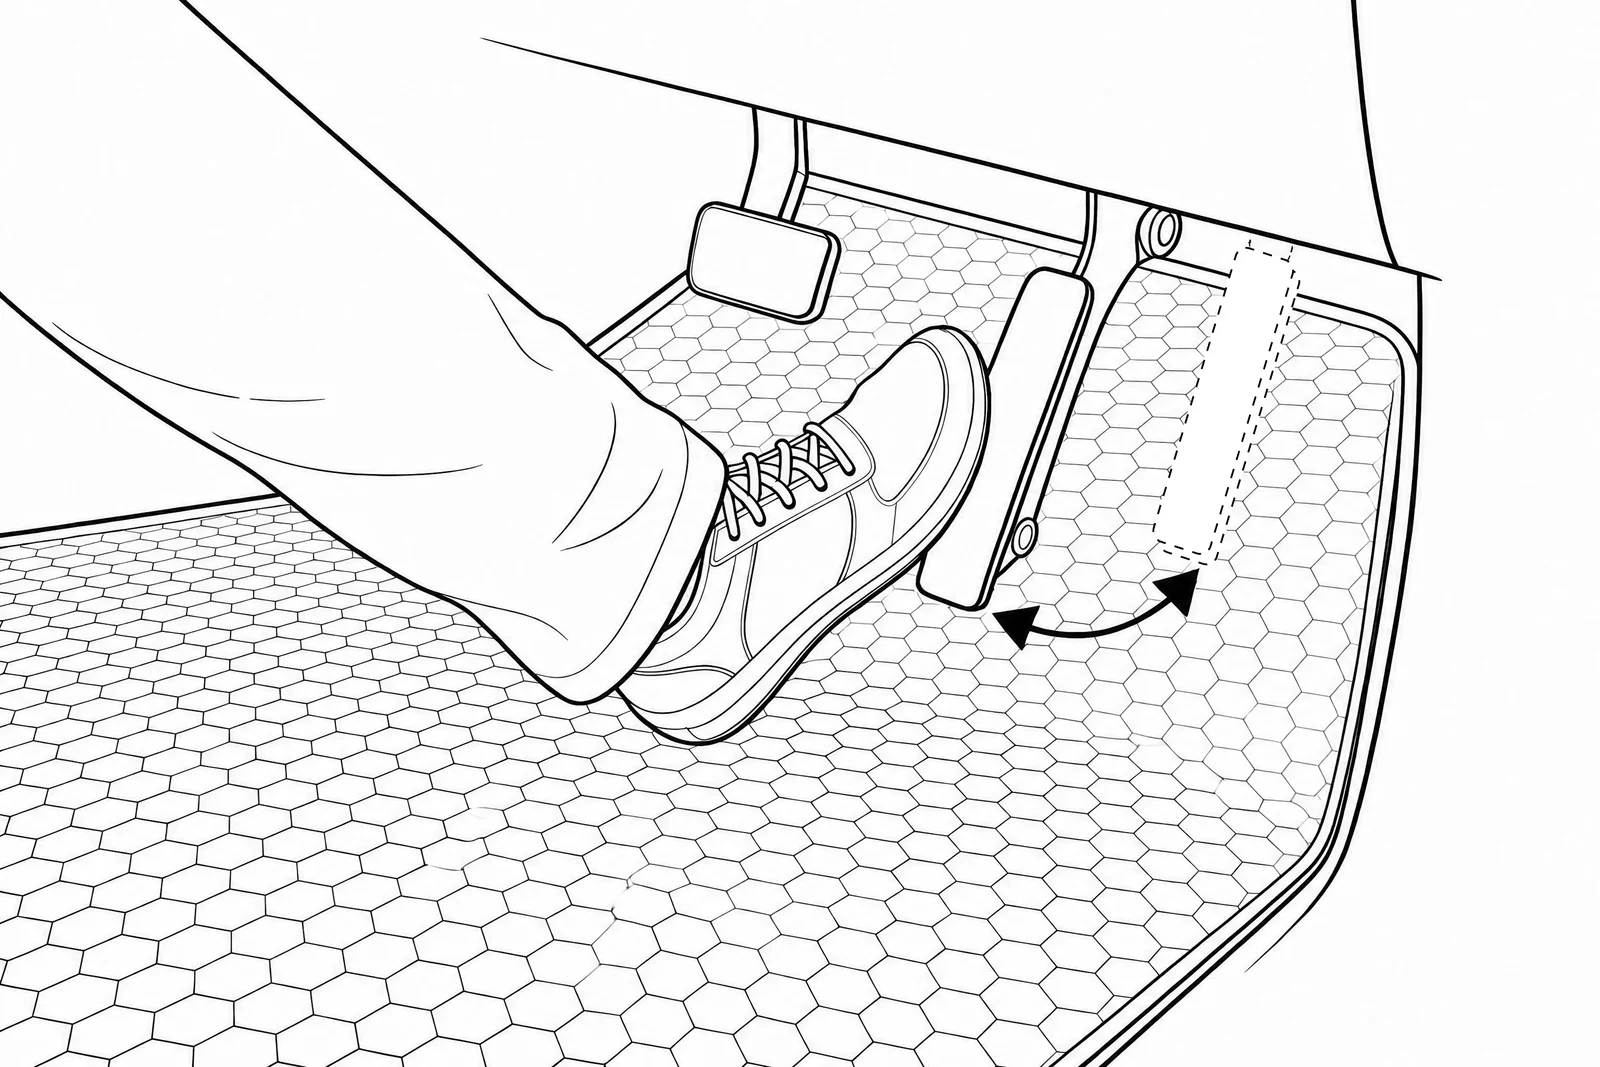
Check 2 — pedals
Press each pedal fully — the mat must not catch or restrict travel.
6
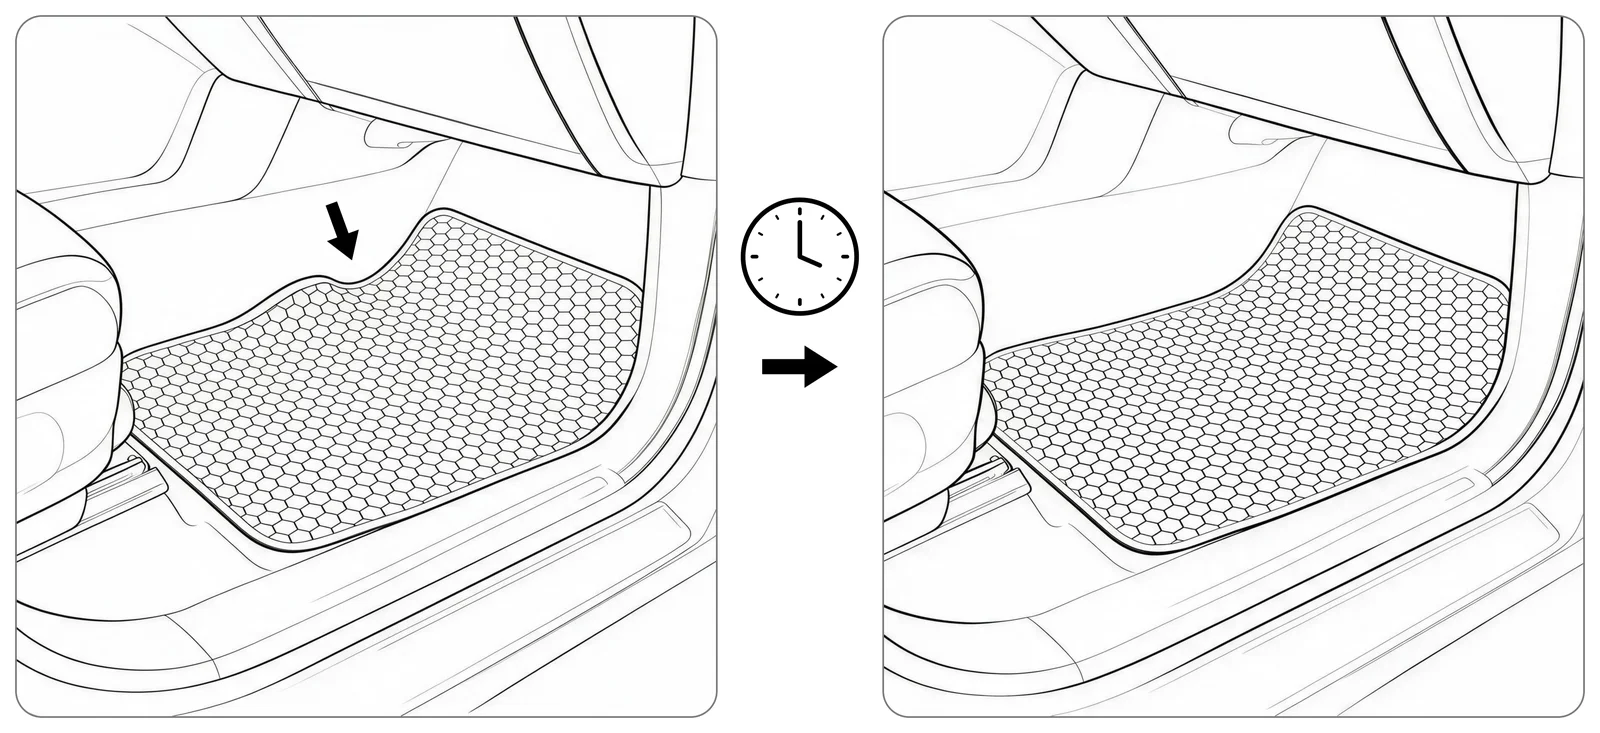
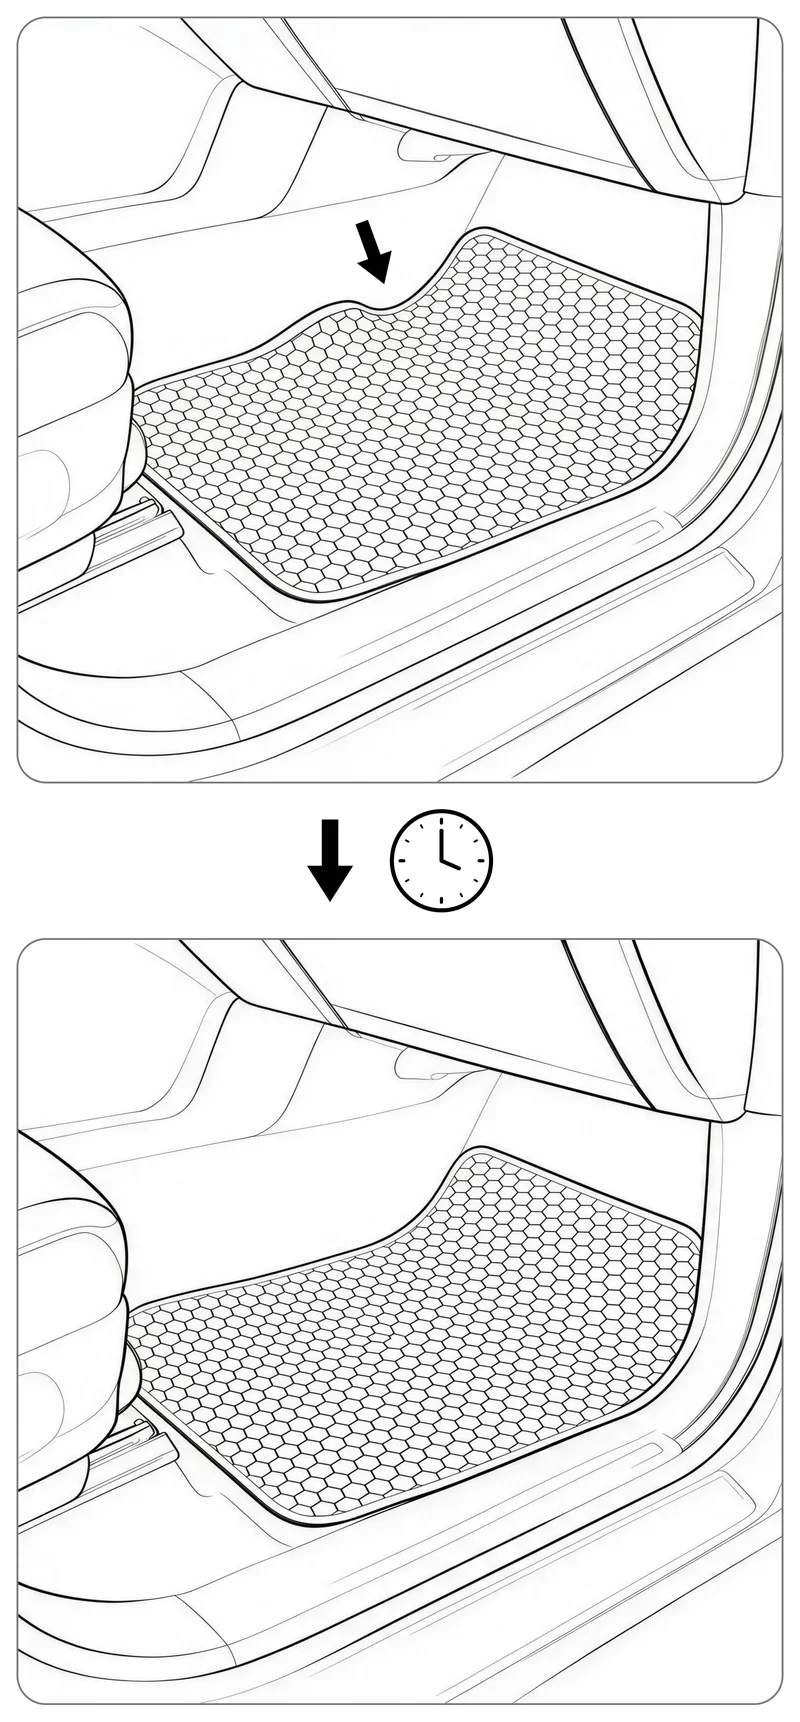
Allow the mats to settle
Done. The mats may feel slightly raised for the first few days — that's normal.
Settling period
Prime EVA mats conform to the floor within 2–3 days — faster in warm conditions.
Maintenance
Cleaning & Care
Daily
Shake clean
Remove the mat, hold it vertically, and strike the back firmly 2–3 times. Dirt and moisture release from the foam cells in seconds — no water needed.
As needed
Deep wash
For heavy soiling, wash with mild detergent and water. Rinse thoroughly and allow to dry completely before reinstalling.
As needed
Pressure wash
Keep the nozzle at least 50 cm from the surface at all times to protect the anti-slip backing from direct jet pressure.
- Do not use harsh chemicals, solvents, or abrasive cleaners
- Do not machine wash
- Avoid contact with open flames or direct heat sources
- Avoid sharp or cutting objects — these damage the anti-slip backing
- Regular cleaning extends the service life of your mats
Need further assistance?
Our support team is available for installation questions, order enquiries, or anything else.